Enabling Verbose Logging allows your system to capture additional details about how the software operates. Enabling Verbose Logging simplifies troubleshooting.
💡 Pro Tip: Chargezoom recommends that QuickBooks Desktop users enable Verbose Logging unless your IT department makes a recommendation to the contrary. This allows your support team to quickly identify any issues.
How to enable Verbose Logging for QuickBooks Web Connector (QBWC)
Confirm that QuickBooks Web Connector is not currently open. If it is open, exit the program and close it. Next, we will open the Registry Editor.
Go to the Windows Run Panel. A quick way to do this is to press the Windows Key and the R key at the same time.
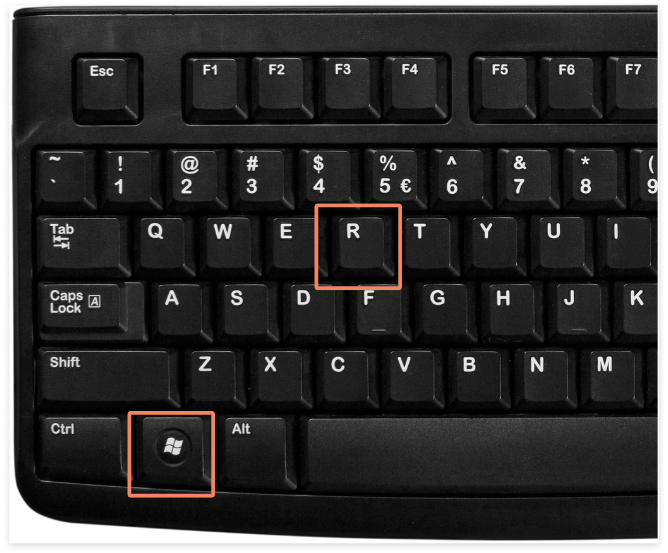
The Windows Run panel will appear near the Windows Start icon on your desktop. For most people, this will be the bottom left of their toolbar.
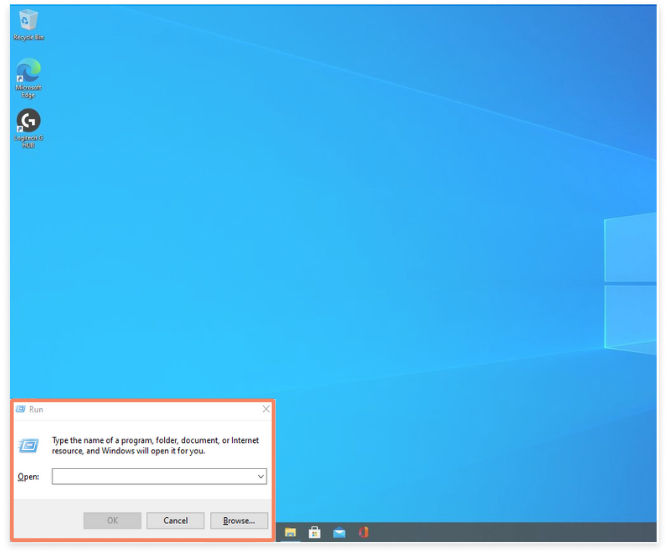
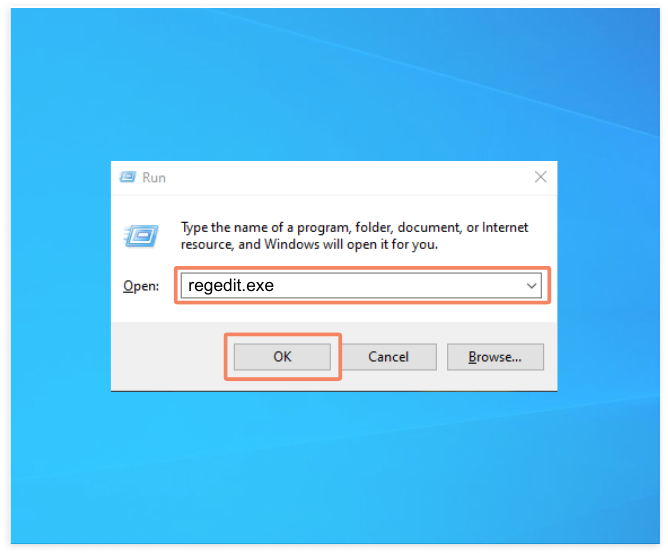
Type the words "regedit.exe" in the box and click OK.
The Registry Editor will appear. From this view, you will navigate to :\HKEY_CURRENT_USER\Software\Intuit\QBWebConnector
Navigate to HKEY_CURRENT_USER folder
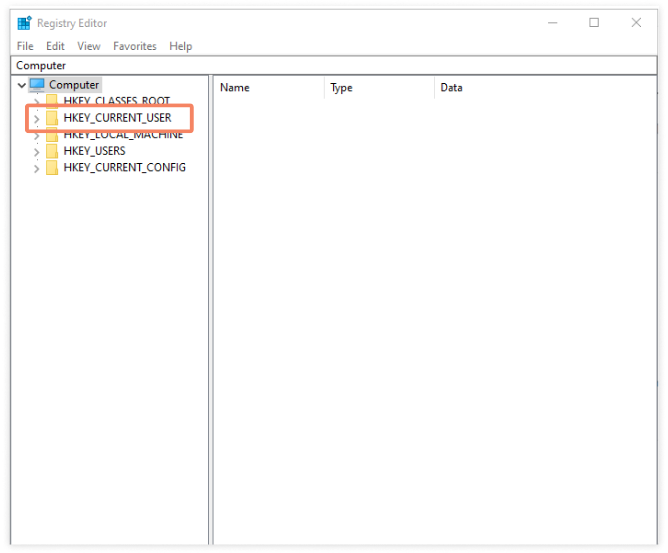
Then navigate to the SOFTWARE folder
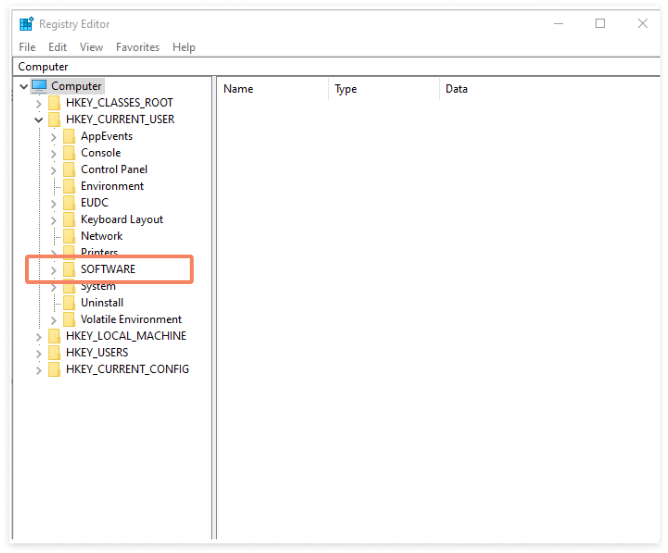
Next, navigate to the INTUIT folder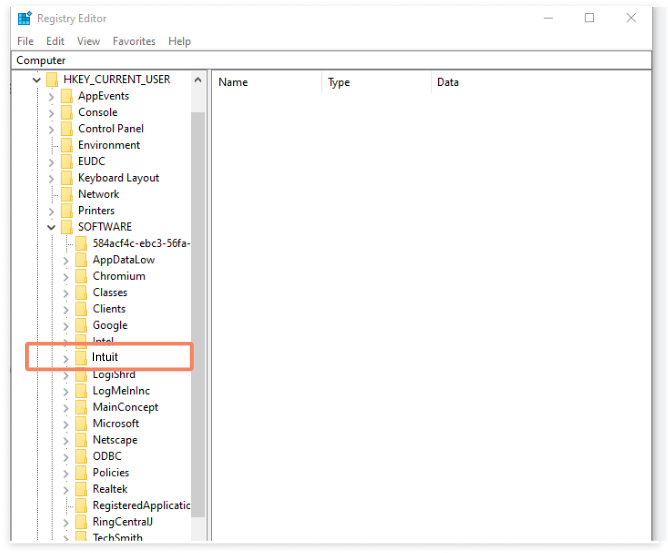
Next, navigate to the QBWEBCONNECTOR folder. Here you will find the LEVEL file. Right-click to view the menu and choose MODIFY.
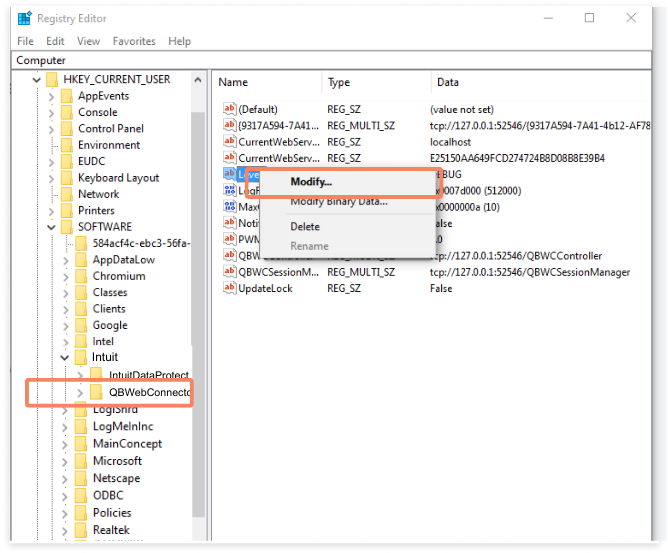
The EDIT STRING menu will appear. Here, you will type in the word "VERBOSE" into the Value Data field. Click OK when done.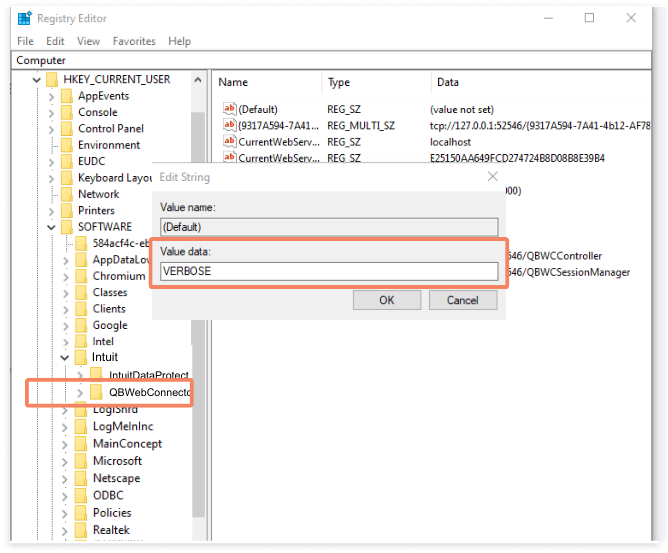
Now that Verbose Logging has been enabled, you can start the QuickBooks Web Connector and run a sync.
By default, the QuickBooks Web Connector log file will be stored at the following file path:
C:\ProgramData\Intuit\QBWebConnector\log\QWCLog.txt
Your log file will show you both the QBXML request and the response that is sent between QuickBooks Desktop and the QBWC server.
Additional documentation for developers can be found on the Intuit Developer Help pages here: https://help.developer.intuit.com/s/article/QBWC-Logging
