Verbose logs give you additional context and detail for your troubleshooting efforts. If you have enabled Verbose Logging, here's how to review those logs.
💡 Pro Tip: Chargezoom recommends that QuickBooks Desktop users enable Verbose Logging unless your IT department makes a recommendation to the contrary. This allows your support team to quickly identify any issues.
To review your Verbose Logs
Confirm that QuickBooks Web Connector is not currently open. If it is open, exit the program and close it. Next, we will open the Registry Editor.
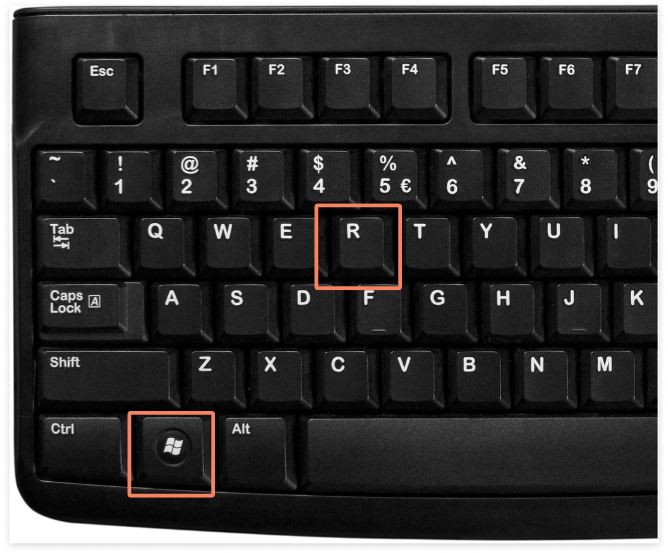
Go to the Windows Run Panel. A quick way to do this is to press the Windows Key and the R key at the same time.
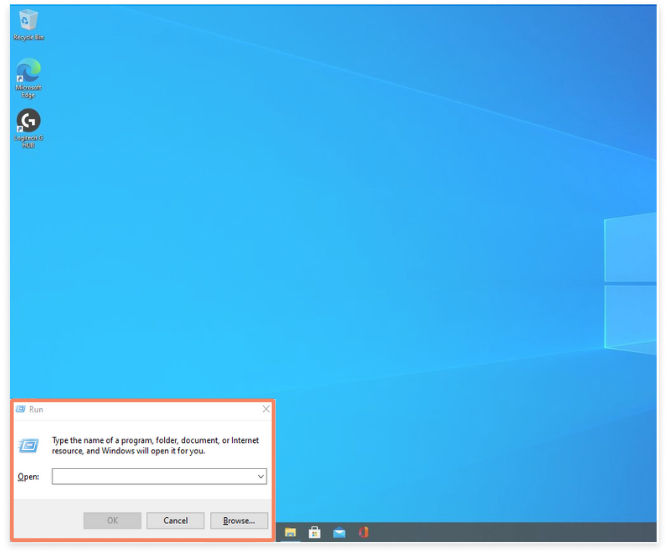
The Windows Run panel will appear near the Windows Start icon on your desktop. For most people, this will be the bottom left of their toolbar.
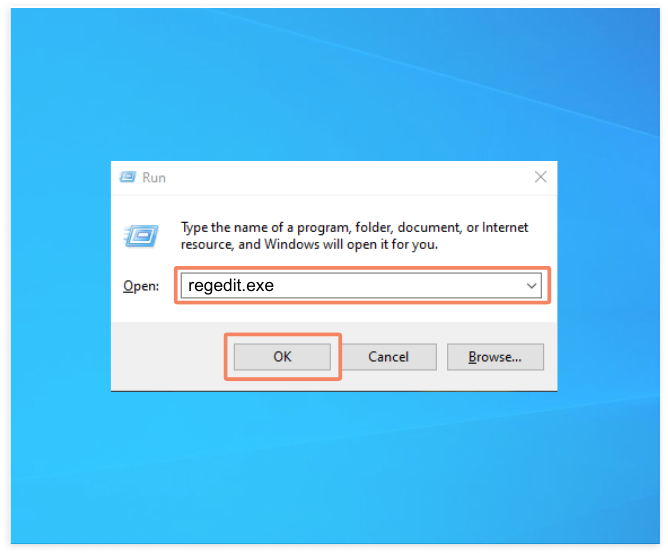
Type the words "regedit.exe" in the box and click OK.
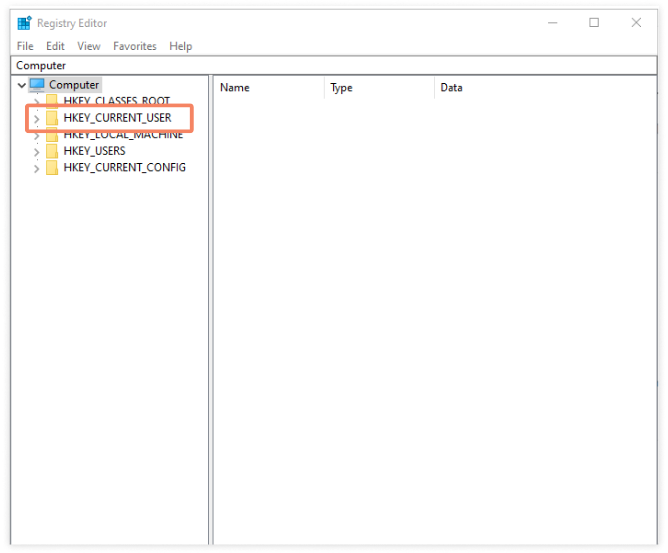
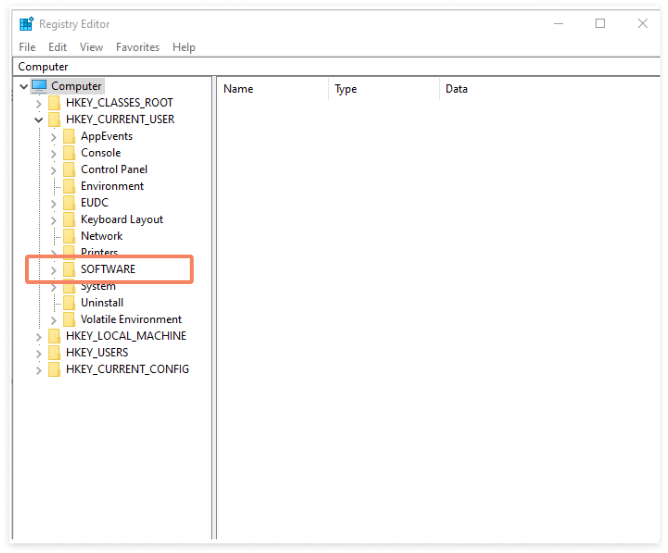
The Registry Editor will appear. From this view, you will navigate to :\HKEY_CURRENT_USER\Software\Intuit\QBWebConnector
Navigate to HKEY_CURRENT_USER folder
Then navigate to the SOFTWARE folder
Next, navigate to the INTUIT folder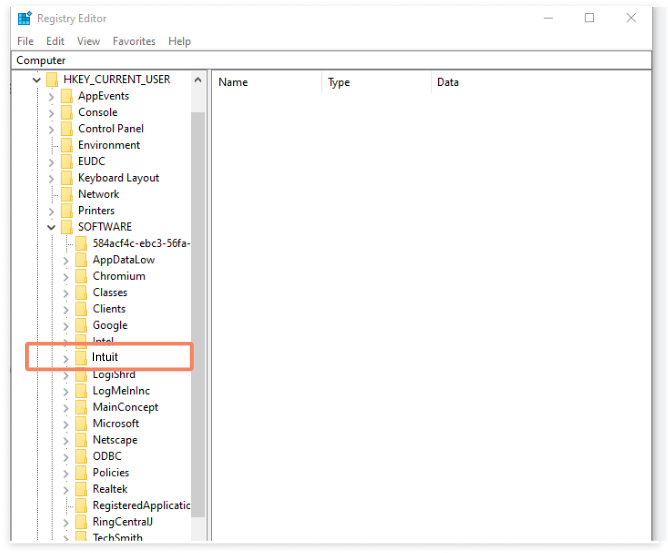
Next, navigate to the QBWEBCONNECTOR folder. Here you will find the LEVEL file. Right-click to view the menu and choose MODIFY.
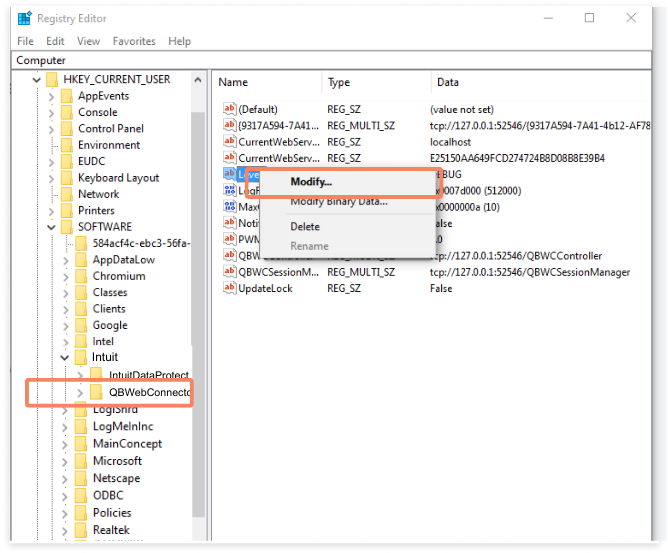
The EDIT STRING menu will appear. Here, you will type in the word "VERBOSE" into the Value Data field. Click OK when done.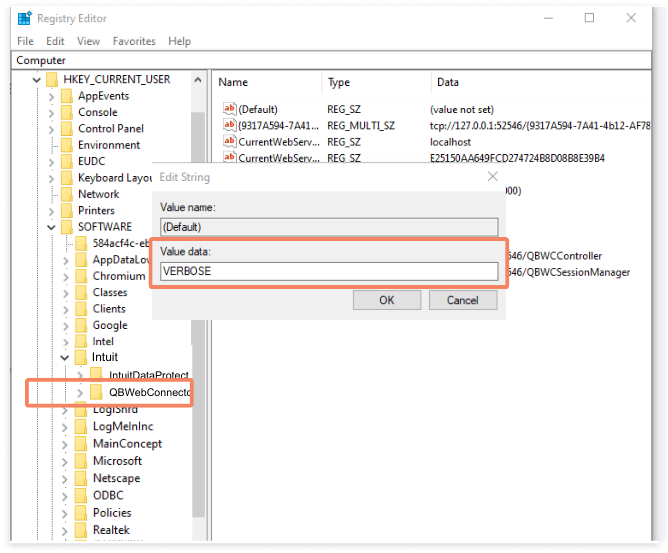
Now that Verbose Logging is enabled, it will overwrite the data in your current Log file. If you want to preserve what is there, you can make a copy or rename your file. Step-by-step instructions to do that are found here: https://23547062.hs-sites.com/knowledge/qbwc1085-quickbooks-was-unable-to-write-to-the-log-file.-quickbooks-will-open-without-writing-to-log-file#rename
⚠️ If the QWC file is not copied prior to sync, your existing file may be overwritten and unable to be retrieved.
Open QuickBooks Web Connector and click the button to View Log.
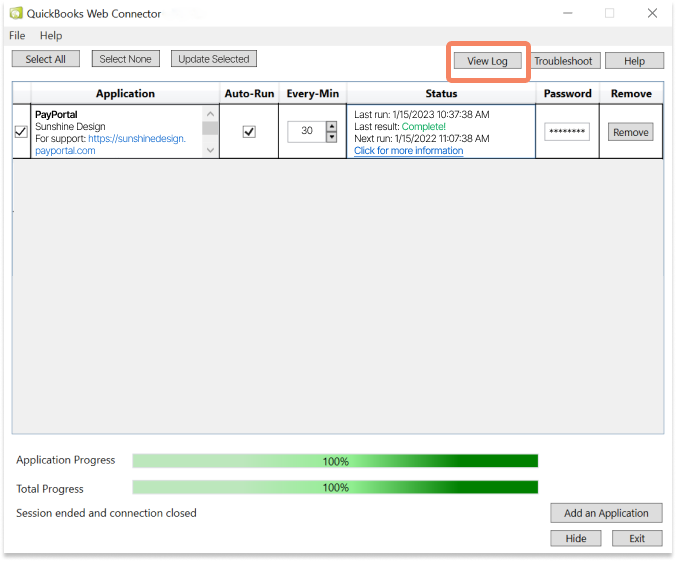
This will open the text file document that is your Log file. It is best practice to start this sync with a blank Log file. If your file contains data, you can easily delete it by selecting all of the contents and clicking delete, then save.
💡 Pro Tip: use CTRL+A to select all content in a document. Then you can easily use backspace or Delete to erase the content. CTRL+S will save your changes.
Inside of Web Connector, confirm that the box is checked to the left of PayPortal, then click the Update Selected button.
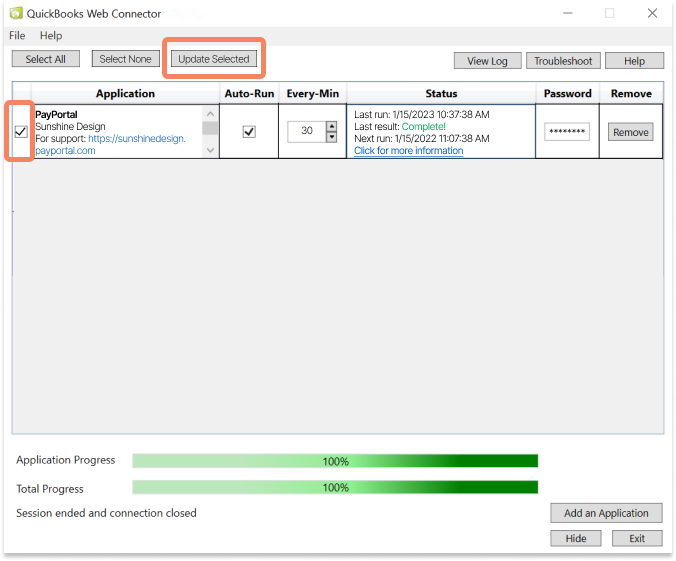
After the update has completed, click the View Log button again to view the new text file.

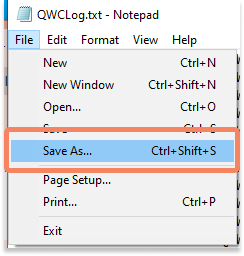
Inside the text file, go to the File menu. Here, you can choose Save As and save a copy to another location on your computer (most commonly, people save this file on their desktop).
