It is easy to sync multiple Company Files from QuickBooks to Chargezoom. Below are the best practices to ensure that everything works seamlessly.
Best Practice Tips
- Always use the Administrator credentials when making configuration changes to Web Connector
- Confirm that you are logged in to the correct QuickBooks Company File
- Disable the Auto-Run option if you will be synchronizing multiple Company Files to avoid slow speeds that may cause errors
- Ensure that your computer security allows the Web Connector to sync properly. This may require configurations to your firewall or anti-virus software
- Ensure that Web Connector can access the QWC file for PayPortal. Most commonly, this is saved to a local drive but it may be on a shared or network drive, depending on your configuration.
- Log in to QuickBooks using the Admin credentials for the Company File that you want to sync
- Open Web Connector by clicking on File then Update Web Services
-png.png?width=259&height=422&name=Group%2010%20(1)-png.png)
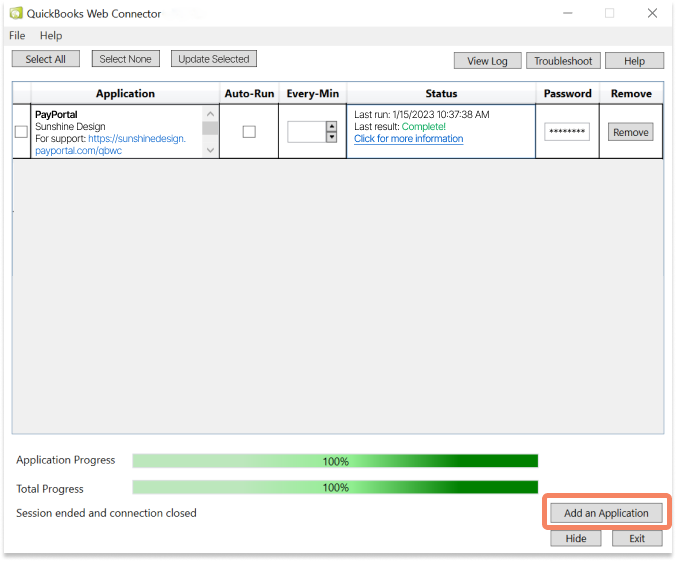
- Add Application
- Select the QWC file that was downloaded when you created your Chargezoom PayPortal account. (This is saved on your local computer drive)
- A warning message will appear from QBWebConnector, select NO
-png.png)
- A security certificate will appear with the details of the Chargezoom PayPortal security credentials. You will be prompted to grant the application access to your QuickBooks data. Click OK
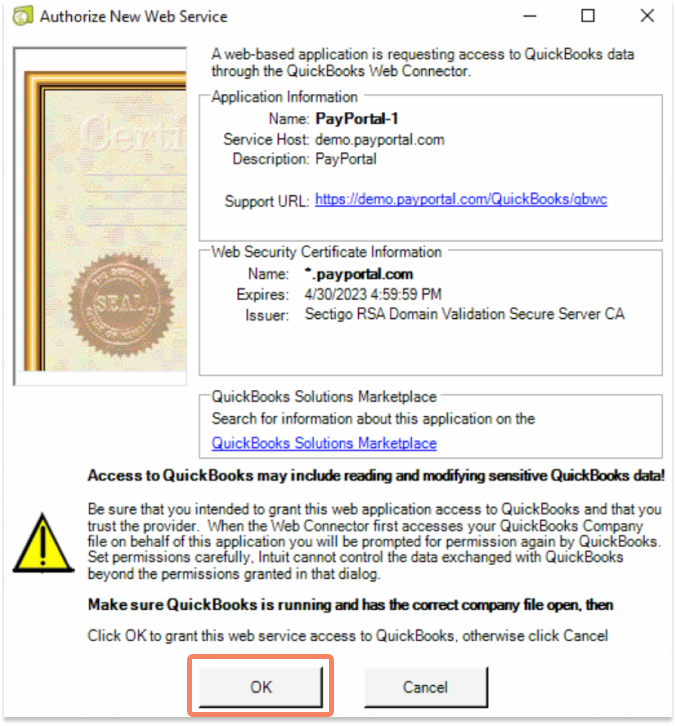
- Next, you will be prompted to allow access to QuickBooks even when the program is not running.
-png.png)
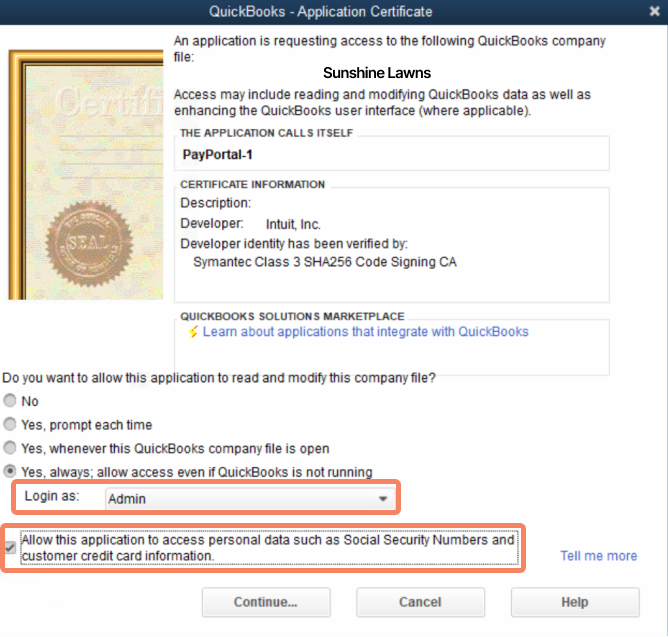
- The Application Certificate will ask you to select the Login credentials which should be set to Admin. You will also need to the application to access personal data by checking the box. Then click Continue
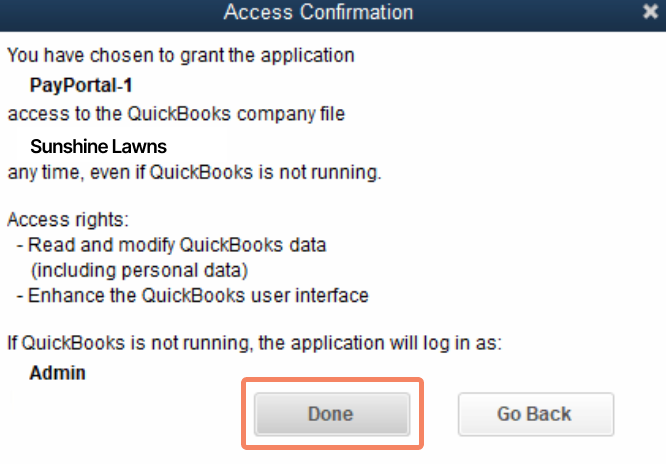
- A confirmation page will verify the details of the access that you have granted the Chargezoom PayPortal application. If everything is correct, click Done.
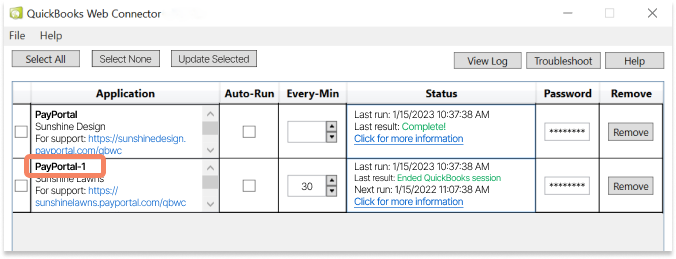
- The application now needs to be added to the QuickBooks Web Connector. Please note: the application has a "-1" appended to it to differentiate your Company Files.
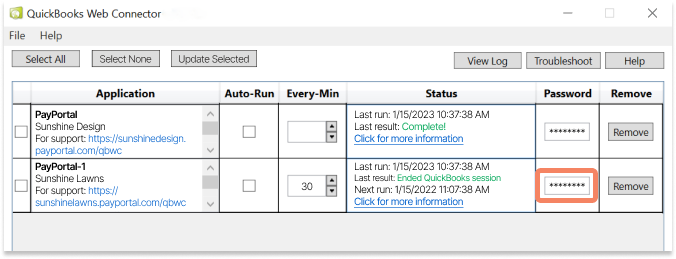
- Enter the password that you created for PayPortal into the Password box
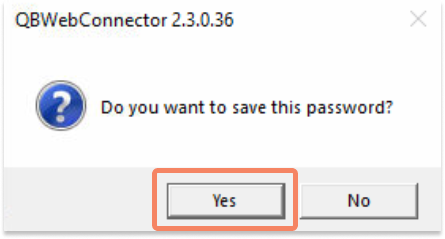
- QuickBooks Web Connector will confirm that you want to store the password. Click Yes.
- Before starting your first sync, check the box next to the PayPortal-1 row. Un-check the box in the Auto-Run column.
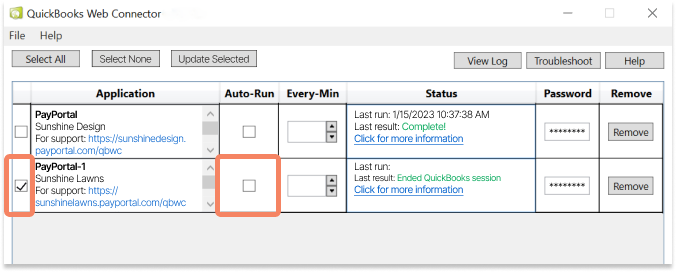
- Click the button for Update Selected at the top of the Web Connector
-png.png)
- The Web Connector will now start to sync the data into your Chargezoom PayPortal account.
⌛ The first sync between QuickBooks Desktop and Chargezoom will be the longest. The time that it takes is determined by the size of your Company File and the speed of your connection. For most users, this process should be completed within 10 minutes. Businesses with large Company Files may take up to 60 minutes for the first sync. Subsequent syncs will be substantially faster with most happening in seconds.
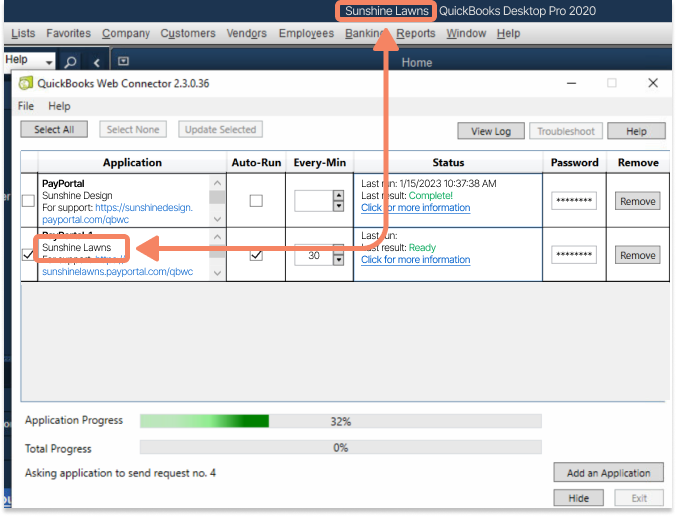
💡 Pro Tip: easily identify which Company File you are attempting to sync by confirming the Company Name at the top of your QuickBooks screen and matching it to the correct row inside of the Web Connector.