Take a step-by-step tour on sending invoices using the Chargezoom Pro plan
📅 During your first 30 days you will have access to additional invoicing features including customizable emails, batch processing, recurring billing, subscriptions, and more that are not covered in this guide. To see the full feature set, please visit the guide for Chargezoom Plus.
Sending an invoice is fast and easy using Chargezoom. You can access invoices through multiple routes, but we will cover the best practices here.
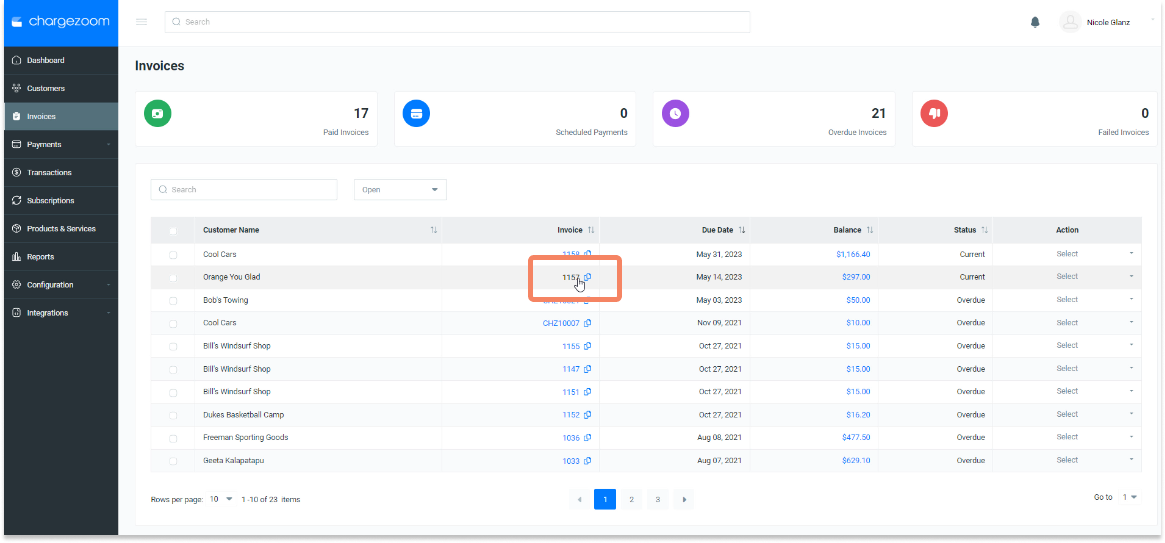
Start by clicking Invoices on the left sidebar navigation. Here, you can sort your invoices by status using the drop-down menu.
When you have identified the invoice that you'd like to send, click the invoice number.
From the invoice page, click the blue button to Email Invoice
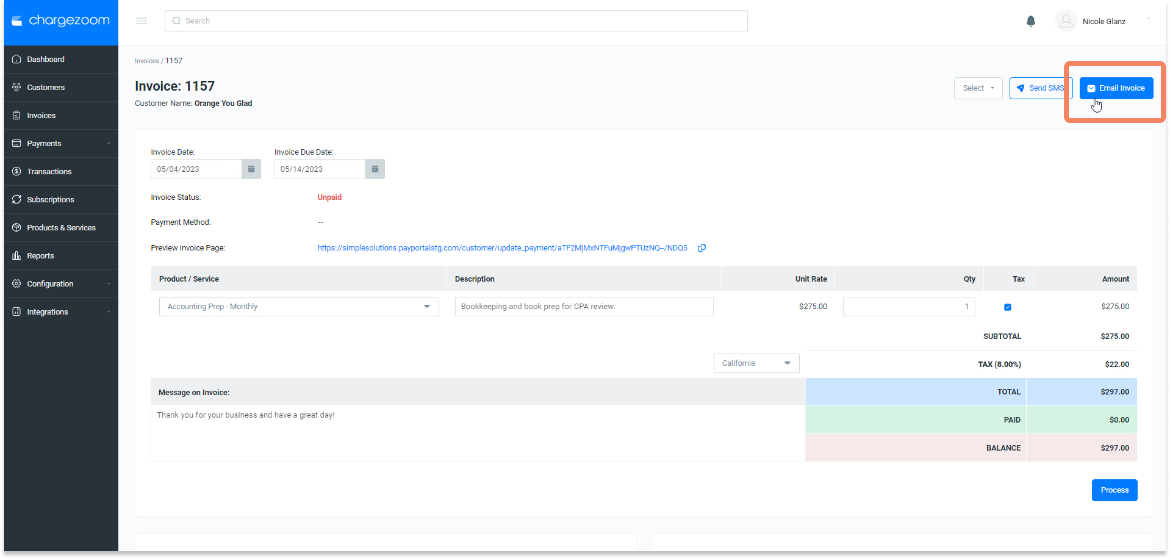
A window will pop-up to confirm the details. Here, you can add additional recipients. By default, a PDF of the invoice will be attached to the email, but can be disabled by sliding the toggle for Attach invoice PDF. When you're ready, click Send.

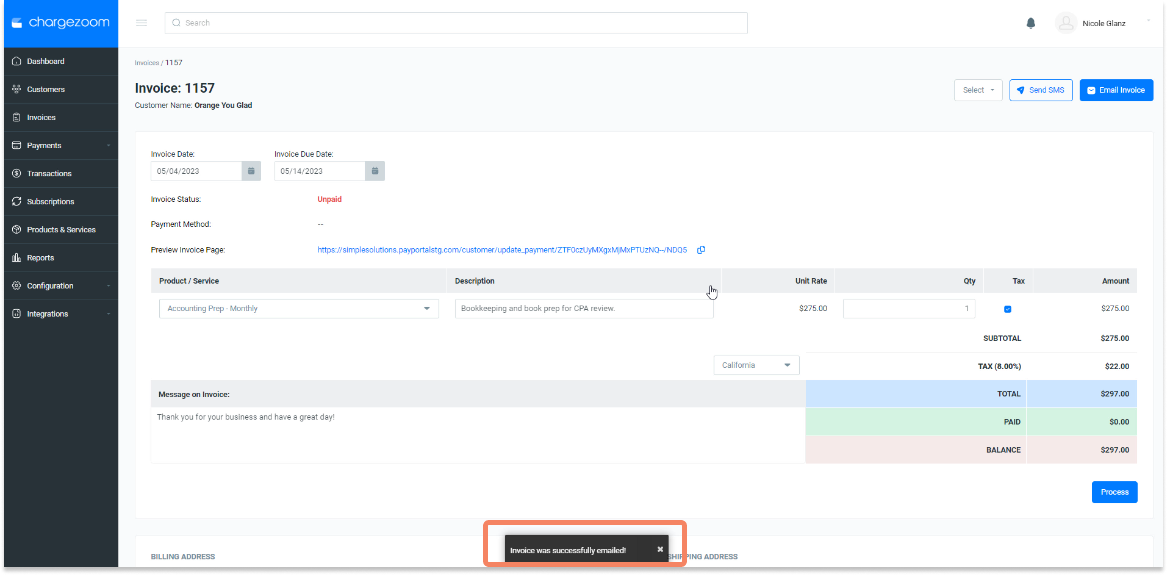
Your email will be queued to send and a confirmation will appear at the bottom of the screen that says Invoice was successfully emailed!